Sunday, November 8, 2015

momofuku inspired pork buns

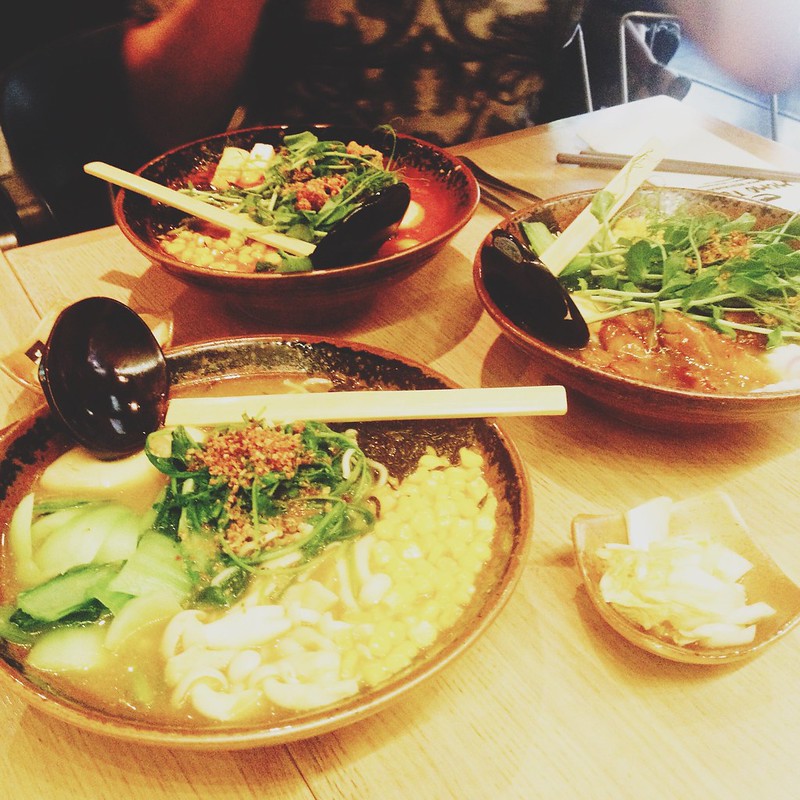
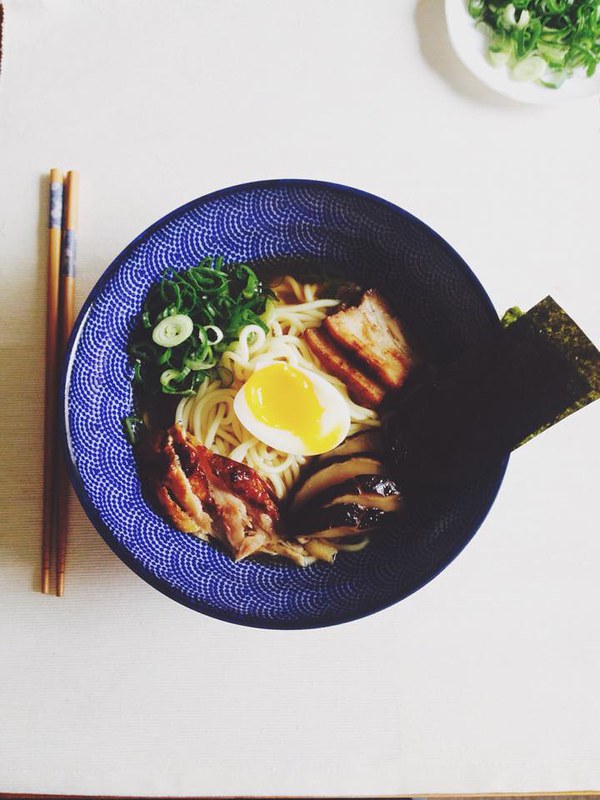
This is one of my most favorite foods from Momofuku restaurant besides ramen.  Since I found out this pork buns recipe, my friends and I have felt in love with it. It requires a lot 
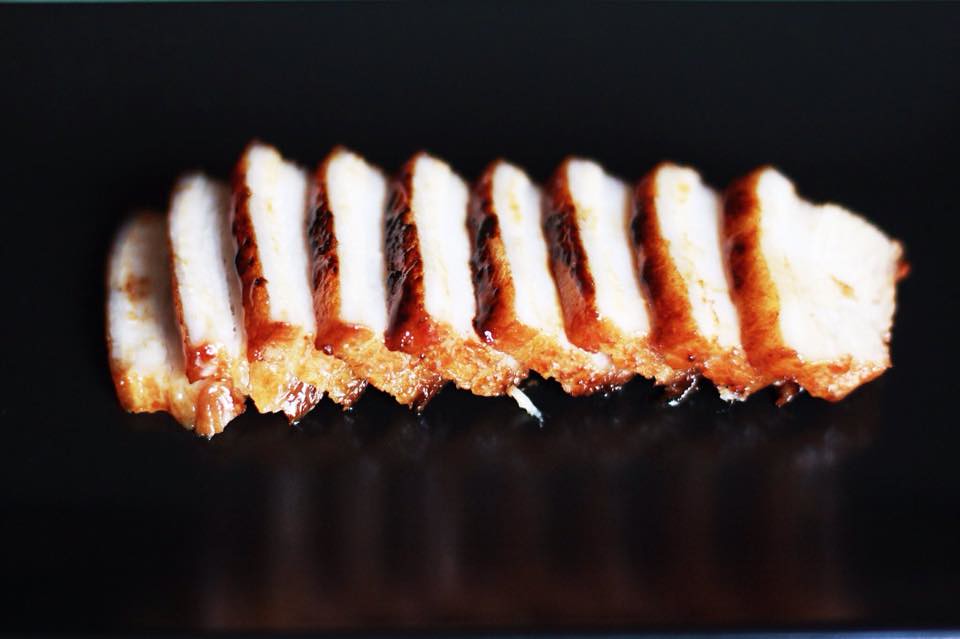
of time to make such as marinating the meat and letting it rest for a long time so that it can have a shining, distinctive flavor which is one of the most important ingredients here. So I usually marinate the night before.

IMG_0808

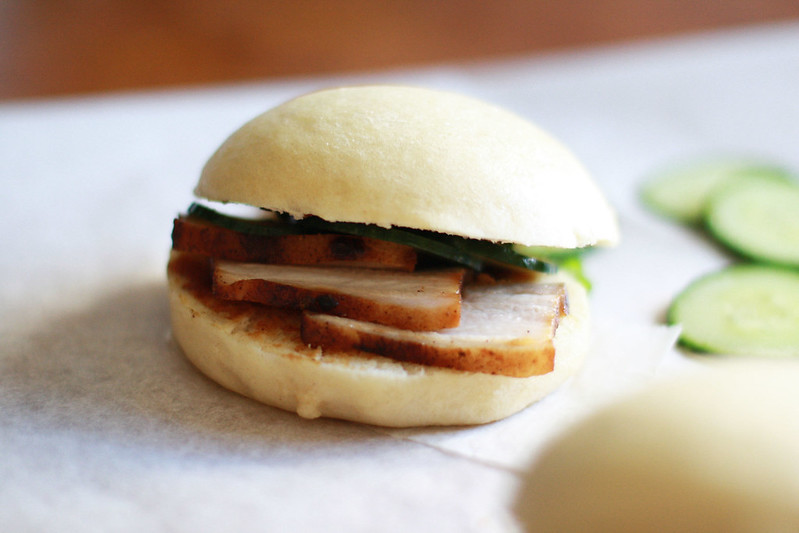
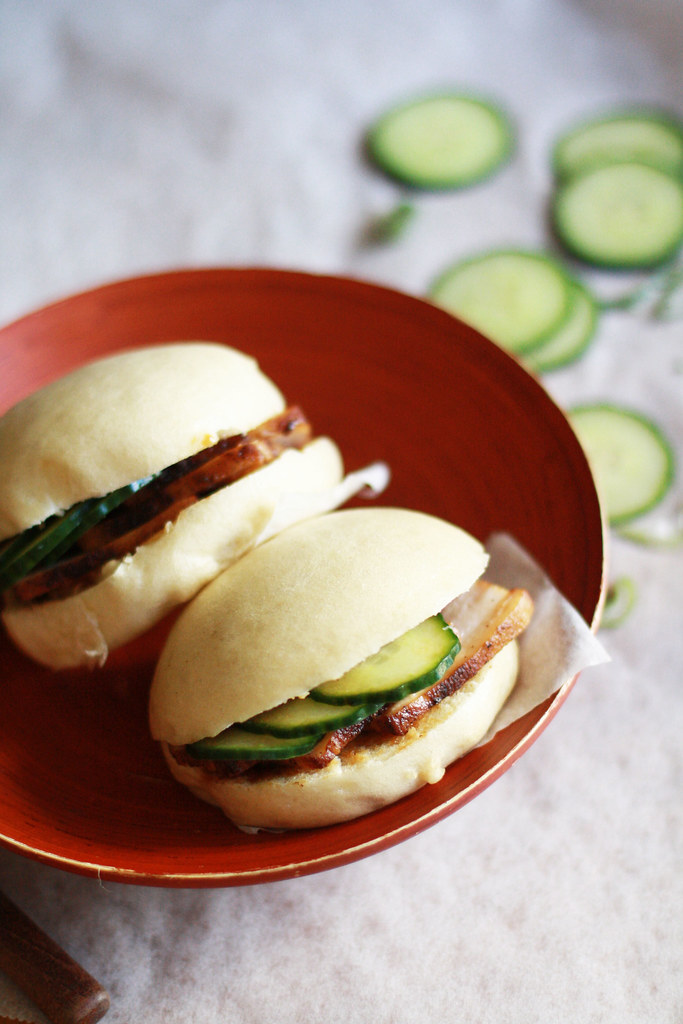
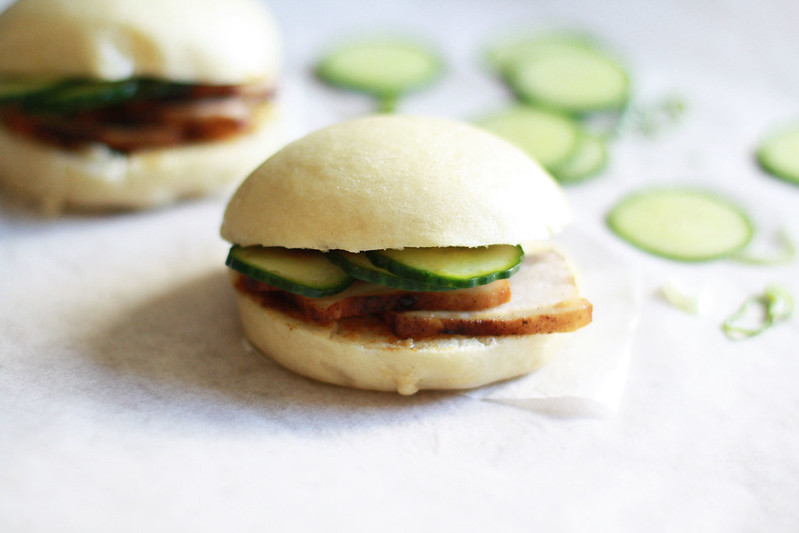
The bun is the combination between a modern sandwich and traditional bun. The meat inside doesn’t need to be minced and mixed with vegetable but still have lot of flavors like the traditional ways. Meat, hoisin and fresh pickled cucumber are perfect combo. David Chang is so genius to create this.

Recipe inspired from momofuku inspired pork buns

IMG_0862

IMG_0809

IMG_0875

For the meat, I like to marinate in Vietnamese way

1,2 kg pork
2 tbsps sugar
2 tsps salt
2 shallots, minced
1 tsp black pepper, very grounded
2 tsps knorr
1 tsp fish sauce

1.     Mix all ingredients well, rub all over the pork, give it a good massage, cover with plastic wrap, put it in the refrigerator at least 5-6 hours
2.     Let the meat in room temperature 20 minutes before cooking.
3.     Fry the meat in pan to golden with oil.
4.     Put it in a baking tray, bake at 200C in 1 hour or so. Checking the time and temperature, you can reduce and increase the temperature depending on the oven so it can be cooked perfectly inside.
5.     Let it rest a few minutes before cutting into slices.

For the pickled cucumber

1.     Slice cucumber thinly
2.     Mix cold water, sugar and vinegar, put the slice cucumber in about 10-20 minutes

For the buns

·         1 tablespoon plus 1 teaspoon active dry yeast
·         4 1/4cups bread flour
·         6 tablespoons sugar
·         3 tablespoons nonfat dry milk powder
·         1 tablespoon kosher salt
·         ½ teaspoon baking powder, rounded
·         ½ teaspoon baking soda
·         1/3 cup rendered pork fat, bacon fat or vegetable shortening, at room temperature
·         Vegetable oil
·         1 cup hoisin sauce
·         ½ cup thinly sliced scallions (green and white parts)
·         Sriracha, for serving

1.     Stir together the yeast and 1 1/2 cups room temperature water in the bowl of a stand mixer fitted with a dough hook. Add the flour, sugar, milk powder, salt, baking powder, baking soda and fat and mix on the lowest speed setting for 8 to 10 minutes. The dough should gather together into a ball on the hook. Lightly oil a large bowl and put the dough in it, turning it over to coat it with the oil. Cover the bowl with a dry kitchen towel and put it in a warm place and let the dough rise until it doubles in size, about 1 hour 15 minutes.
2.     Punch the dough down and turn it out onto a clean work surface. Using a sharp knife, divide the dough in half, then divide each half into 5 equal pieces. Gently roll the pieces into logs, then cut each log into 5 pieces, making 50 pieces total. They should be about the size of a Ping-Pong ball and weigh about 25 grams each. Roll each piece into a ball and set them on baking sheets. Cover them loosely with plastic wrap and let them rise for 30 minutes. While they're rising, cut out fifty 4-inch squares of parchment paper.
3.     After 30 minutes, use a rolling pin to roll each ball into a 4-inch-long oval. Brush lightly with vegetable oil, lay a chopstick horizontally across the center of the oval and fold the oval over onto itself to form a bun. Gently pull out the chopstick, leaving the bun folded, and transfer it to a square of parchment paper. Put it back under the plastic wrap and form the rest of the buns. Let the buns rest for 30 to 45 minutes: they will rise a little.
4.     Set up a steamer on top of the stove. Working in batches so you don’t crowd the steamer, steam the buns on the parchment squares for 10 minutes. Remove the parchment. You can use the buns immediately or allow them to cool completely, then put them in plastic freezer bags and freeze for up to 2 months. Reheat frozen buns in a stove top steamer for 2 to 3 minutes, until puffy, soft, and warmed all the way through. Freeze half the buns in airtight bags for another time.

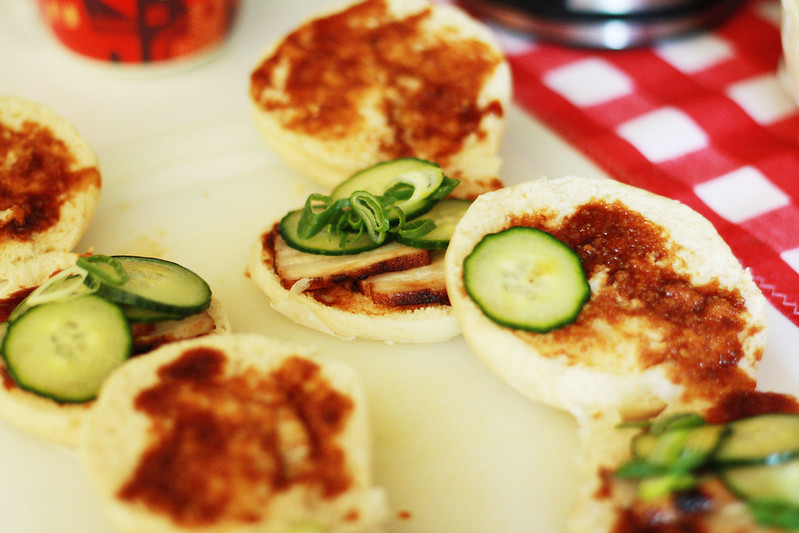
5.     Open a warm bun and spread about 2 teaspoons of hoisin sauce on the inside. Add 2 pieces of pork belly, then a couple slices of pickle. Add a scattering of scallion and a squirt of sriracha if you like. Repeat with the remaining buns, and eat!

Sunday, September 20, 2015

Blueberry pie - Mustikka rahkapiirakka

Mustikkarahkapiirakka

This pie uses rahka, a kind of Finnish quark. It is a bit sour like yogurt. I love to use rahka firstly because it is healthy, and secondly its taste can balance the sweetness of the pie but still creamy. The Finnish people like to use rahka in their many desserts. I searched for a while the recipes and chose one from Arla, I think it turned out pretty well. I brought the pie to my friend house and they all like it. The recipe is in Finnish, I tried to translate it into English. Probably it isn’t the best translation but hope to give you the main ideas of how to do it.

Blueberry Luukki Mustikkarahkapiirakka Mustikkarahkapiirakka Luukki woods

Into the woods

Blueberry pie Luukki

In Luukki

Ingredients
Serve 8

For the dough
2 1⁄2 dl flour
100 g butter (I substituted by 72 g margarine)
3⁄4 dl sugar
1 egg
1 tsp. baking powder

Filling
1 dl milk
250 g quark (I used 200g)
1 egg
1 dl sugar
1 tsp. vanilla sugar

Topping
2-3 dl fresh blueberry

Directions
1.     Mix the egg, sugar and melted butter/margarine together. Combine the flour and baking powder, and then add into the egg-sugar mixture. Mix the battle evenly. Press the crust to the bottom and the edges of a greased baking dish (24cm).
2.     Mix the filling ingredients until smooth. Pour it over the base. Bake the pie at 200-degree oven for medium level for about 40 minutes. Decorate with fresh blueberries on top of the finished cake.
I added a handful of blueberry into the mixture just before baking.

Tips
To get the pie a festive look, use ordinary blueberries to decorate instead of highbush blueberries.
In my opinion, it would even better to serve with vanilla ice-cream, aren’t blueberry pie and vanilla ice-cream best friends?


Saturday, September 5, 2015

Blueberry pancakes

pancake

One day in summer, I went to Luukki with my friends for picnic, we played cards, enjoyed the sun, ate pork buns, and the cool breeze. Suddenly, I found out there were a lot of blueberries, so the picnic had turned out to be blueberries picking day, which was totally unexpected. I found myself immersed in blueberries picking activity despite the mosquitoes bit me, one friend helped me to pick up blueberries, another used a hat as a tape hand fan to dismiss the mosquitoes.

IMG_0339
We walked for a while and then stopped to pick up blueberries when sawing many beautiful, precious berries alluring underneath the green leaves on two sides of the road. It was so tempting because it was in your hand reach, right next to you, whenever you went. Blueberries season! My friends had took turn to stop me, trying to say that was enough, but  ”I couldn’t hear anything but blueberries calling”.

blueberries
Not stopping there, a week later, I went to Luukki again. This time, I went alone to pick up as much as I wanted, and as long as I wanted. I am not the only one. Many people had brought the big buckets with them on that day, I’m nothing compared to those levels, but the friends kept calling me blueberry addict.

Truly speaking, I don’t like to eat blueberries on its own because it’s so sour to my taste. But when I mix with banana, honey, and yogurt to make smoothie, I think it’s excellent. Moreover, I usually make blueberry kissel to eat with porridge in the morning for breakfast. I also used blueberries to make face mask (by mixing blueberries, honey, and plain yogurt) and it’s one of my 2 favorite face masks so far, another one is avocado & milk.

Since the berries were so fresh and pretty, I decided to make blueberry pancakes, American version which I think they are fluffy & cute. They tasted pretty good. Also love the violet pansies I grew in summer.

pancake

pancake

Ingredients

I made about 2/3 of original recipes
1 cup cups all-purpose flour
2 1/2 teaspoons baking powder
1 teaspoon salt
2 tablespoons white sugar (to satisfy my sweet tooth)
3/4 cup milk
1 egg
3 tablespoons butter, melted (I used oil)
2 tbsps. quark (optional)

Directions

1.     In a large bowl, sift together the flour, baking powder, salt and sugar. Make a well in the center and pour in the milk, egg and melted butter; mix until smooth.
2.     Heat a lightly oiled griddle or frying pan over medium high heat. Pour or scoop the batter onto the griddle, using approximately 1/4 cup for each pancake. Brown on both sides and serve hot.
I use eggs ring to create the shape for pancakes


Saturday, August 29, 2015

Siivouspäivä & ramen

Ramen at Momotoko

Yesterday is siivouspäivä, which means cleaning day. On that day, we can sell our unwanted stuffs outdoor. We went to Vanhakirkkopuisto park, it was fun though I couldn’t sell a lot this time, but I felt relief when someone bought something. Yes guys, I want to be more conscious with my next buy. It doesn’t mean to buy expensive thing but thing that I actually love!

Our dinner is ramen at Momotoko restaurant. I ordered miso vegetable because I ate vegetable this week. It is very full but the broth is too mild. My friends ordered Tantanmen and Shoyu, they said it’s better. 

Thursday, July 30, 2015

Ramen

ramen 1
  My ramen's toppings: soft boiled eggs, shiitakes, chashu, scallion, nori and roasted chicken.

In Japan, the noodle that rules all others is ramen and undoubtedly it is one of the most popular dishes over there. Though it varies region by region, basically it includes meat or fish based broth, flavored with soy sauce or miso, and toppings are chashu (Japanese braised pork), nori (dried seaweed), kamaboko (cured surimi) & green onion.

·         Yokahama: where the first ramen shop appeared in Japan, the soup is fatty and salty
·         Hakodate: the broth is pork and chicken based
·         Sapporo: it’s miso based topped with sweetcorn
·         Kitakata: the noodle are flat

Momofuku ramen is closely to Tokyo style which has a touch of dashi (kombu & katsuobushi), and the toppings are scallion, menma (fermented bamboo shoots), sliced pork, kamaboko, egg, nori & spinach.

Recipe adapted from momofuku ramen

Ingredients

Ramen broth (I made the broth a half of the original recipe)
22 g kombu
2,5 l water
21 g dried shiitakes
1 kg pork bones
1 carrot
2 scallion roots and whites

Tare
1, 3 kg chicken (3 chicken legs: cut into thigh pieces & drumsticks)
140 g bacon
1/2 cup sake
1/2 cup mirin
1 cup soy sauce

Directions

Make the ramen broth
1.     In a large stockpot, heat the water to 70°C. Turn off the heat and steep the kombu in it for 1 hour.
2.     Roast pork bones until mahogany color in the oven at 200°C about 30- 45 minutes.
3.     Peel carrot and mirepoix.
4.     Soak dried shiitakes mushroom in hot water about 15 minutes. Wash briefly in cold water, and squeeze the exceeded water. I don’t know why but it is the way my mother and Vietnamese friends deal with the dried shiitakes before properly cook them.
5.     Remove and discard the kombu and add roasted pork bones. Bring to a gentle simmer and skim off the impurities that rise to the top during the first 15 minutes of simmering. Add the shiitakes, carrot, scallion roots and whites. Adjust the heat so the broth simmers gently for 3- 4 hours.
6.     Skim, strain the broth and chill. In case you want to reduce the finished broth, add water when in use.

 Make the tare
1.     Place the chicken in a baking dish; apply a light brush of oil on the skin. Roast in a low oven first at 125°C, so it renders out some fat to cook in then crank it up to 200°C after a couple of minutes. It’s ready when the chicken reaches the mahogany color. It takes about 40-50 minutes.
2.     Remove the chicken from the baking dish. Deglaze the dish with the sake. Scrape the baking dish to “release the fond”. Return the chicken to the saucepan, set it over a medium-hot stove, and add the remaining ingredients.
3.     Lower the heat to the barest of simmers. Keep it there for 1, 5 hour. The idea is infusion, not reduction.
4.     Strain the meat and bones out of the tare and discard them; (keep chicken & bacon if you like)
5.     Chill

To serve
In a separate saucepan, heat the broth and add some water; season with salt & tare to taste. Serve with alkaline noodles, sliced pork and soft boiled eggs.


Thursday, July 23, 2015

Chashu - Japanese braised pork

Chashu

The side effect of watching Chang’s cooking episodes is that whenever I saw or tasted something delicious I thought ” this is insane” & then laughed at myself. I like him, like his sense of humor. He is so real and honest.

When I look at the picture of Momofuku ramen, I’m so into Chashu that I searched for the recipe how to make it. Luckily, I found it on Just one cook book, where she gave the step by step instructions.

It tastes like Vietnamese style caramel pork but sweeter due to sake and mirin. The sweet and salt combination is so umami with ginger infused. The ingredients I used is a bit different, I don’t know what to do with the left-over of Ajitsuke tamago’s marinade from yesterday so I add some sake, salt, and ginger to use for Chashu.

Chashu

Recipe is inspired and adapted from the original one justonecookbook

Ingredients

544 g pork belly
1 tsp salt
1 bulb of spring onion
1 tbsp oil

For the sauce
1/3 cup soy sauce
3/4 cup water
1/3 cup sake
1 tbsp mirin
1/2 tbsp brown sugar + 2 tbsps white sugar
1 tsp salt
6 slices of ginger

Directions

1.     Cut spring onion into 2 inch lengths and separate the green parts and white parts. Slice all the white parts and a few green parts thinly. (slicing a few green parts is optional, Shiraga Negi indicates only the sliced white part of spring onion, but I would like to keep a few green pieces to make it colorful).
2.     Soak in cold water for 10 minutes and drain well. Put it in an air-tight container or cover with plastic wrap. We will use this for garnishing later. 
3.     The rest of the green parts will be used later on for cooking.
4.     Peel and slice ginger.
5.     Clean and dry pork belly with kitchen paper. Sprinkle and rub the salt on the pork belly.
6.     Heat the oil in a frying pan over high heat and brown the fat side first, then flip over to brown the other side. It’ll take about 10 minutes.
7.     While browning, put all the ingredients for seasonings in a pot.
8.     Place the pork belly in the pot and add ginger and spring onion and bring it to a boil.
9.     Place a lid on top of the pot, but only cover about 8/10 part of it.
10.  Lower the heat to medium low and simmer, occasionally turning, for about one hour or until there is ¼ inch liquid left in the pot.
11.  Remove the lid and reduce the sauce until you can see the bottom of the pot when you scrape the sauce. Stay in the kitchen as the meat can easily get burnt if there is no liquid left. After 15-20 minutes or so, bubbles start to appear. You are getting close to the end. Turn off the heat when you see the bottom of the pot when you slide the meat around. The sauce is now thickened and meat is shiny.
12.  Take out the meat and cut into thin slices.
13.  Transfer to a serving plate and top with Shiraga Negi.
      
      If you don’t use the chashu right away, pack the chashu and the sauce in an air-tight plastic bag to give it more flavors all around. You can store it in the refrigerator up to 5 days and 3 weeks in the freezer.


Related Posts Plugin for WordPress, Blogger...